Monday, June 12, 2017

The New iOS 11, The New Features

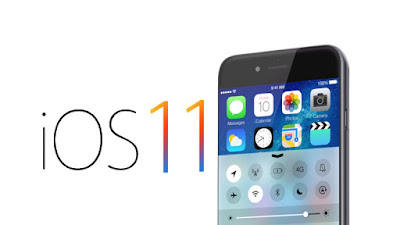
On June 5, 2017, iOS was officially introduced by Apple CEO Tim Cook, at WWDC. So as the next generation of iOS, what are its differences on earth from previous versions? And what new? It is what we are taking about in this post.
The Control Center - it is customizable and there are options to include a wider range of settings. It's no longer split across multiple screens, and 3D Touch integration has expanded, so you can do more without needing to open the Settings app.


The Lock screen - it's been merged with Notification Center. Swiping down on the screen to access notifications now brings up the Lock screen. Today view continues to be available with a side swipe, and everything generally looks the same - there's just no separate Notification Center anymore.

Siri - it has a more natural voice and is more intelligent than ever. Siri learns user preferences and syncs that information across multiple devices, allowing the personal assistant to learn more about you and anticipate what you want. Siri can also translate English into different languages like Spanish and Chinese, and there's deeper Siri integration with Apple Music.

For the iPad - Apple has introduced a host of new features that make it more capable than ever before. A persistent Dock at the bottom of the display a makes it easy to launch and switch between apps, and there's a new App Switcher that's similar to Mission Control on the Mac, letting you see everything you're working on at a glance. For iPad Pro owners, the Apple Pencil does more, and several apps, like Mail and Notes, support inline drawing.

Drag and drop - you drag content like images and links from one app and drop it in another, and on both the iPad and the iPhone, there's a new Finder-style Files app for managing files. Files lists all files stored locally, in iCloud Drive, and in third-party cloud services like Dropbox and Google Drive.

New keyboard features - like a one-handed keyboard on the iPhone and a "Flick" option for typing numbers and symbols more quickly on the iPad, and many of the built-in apps have new functionality.

Notes features - searchable handwriting and document scanning.

Maps - lane guidance, speed limit info, and indoor maps for malls and airports.

Apple Music - includes options to see what your friends are listening to.

HomeKit - supports speakers and there's a new AirPlay 2 protocol that includes multi-room functionality. Do Not Disturb has been expanded to encompass driving, muting notifications while a vehicle is in motion.

iMessage - improved with a new App Drawer that makes it easier to access Messages apps and stickers. Messages is also gaining support for a new person-to-person Apple Pay feature that lets you send money to friends and family right through an iMessage, and iMessages themselves are now stored in iCloud, sync across devices, and take up less storage space.

Photos and videos - take up less space through the adoption of new HEIF and HEVC formats.

The Memories feature in Photos - smarter than ever, and in the Camera app, Portrait Mode and Live Photos have been improved with new capabilities.

The App Store - completely revamped in iOS 11, and there are now two distinct sections for apps and games. There's also a new "Today" view that features new content on a daily basis to make it easier to discover fresh apps and games.

By the way, iOS 11 is now in Beta for developers. You can download it and upgrade to iOS 11 beta to experience these new features. Even though after downloading and upgrading it, you don't get used to it, or some bugs happen, you can also downgrade from iOS 11 to previous iOS 10.3.2/10.3.1.

More Related Article You May Like:
How to Recover Deleted Pictures from Phone >
How to Recover Deleted Text Messages from Phone >
How to Recover Deleted Files from Phone >


Wednesday, June 7, 2017

How to Use Music Airplay on iPhone Music App

Airplay allows you to wirelessly stream what's on your iOS devices and Mac to your HDTV and speakers. When playing your favorite music in the new Music App, you may want to Airplay the music to Apple TV or a stereo at home. Do you know how to make it? If the answer is no, we will show you how to make music Airplay from Apple's new Music App.


Part 1 How to Turn on AirPlay from Now Playing in Music
Step 1. Tap on the track information button.
Step 2. Tap on the AirPlay button, middle right.
Step 3. Tap on the source you want to AirPlay to.

Part 2. How to AirPlay from Control Center
Step 1. Swipe up from the bottom bezel to bring up Control Center.
Step 2. Tap on the AirPlay button.
Step 3. Tap on the source you want to AirPlay to.

Also Read: How to Turn of Shuffle on iPhone in Music App >

If you want to turn off the Airplay, go to source list and pick up your iPhone or iPad. If you want to transfer music from Mac/PC to iPhone/iPad and vice versa, you can use AnyTrans to help you manage music between computer and iOS devices. If you still have any question about this guide, you can contact our support team by email. If you like this guide, don't forget to share it with your friends.

More Related Article You May Like:
How to Make Google Maps Default on iPhone >
iPhone is disabled connect to iTunes? How to Unlock it? >
How to Get Portrait Mode on iPhone 7 >
How to Add Friends on Game Center iOS 10>
How to Authorize a Computer on iTunes >
How to Change Your iCloud Email >


Sunday, May 14, 2017

How to Fix iPhone 5/6/6s/7 Siri Not Working After iOS 10.3 Update

Siri is now a lot more useful in iOS 10, and it works with third-party apps, say, WhatsApp or WeChat, and you’re also able to call for an Uber with Siri. But sometimes Siri may not work well on your iPhone or iPad after downloading iOS 10/10.1/10.2/10.3. Also, some iPhone 7/7 Plus users also reported that Siri not working on their device.


There are kinds of Siri issues you may meet: Siri not respond on your iPhone/iPad, Hey Siri or Siri Dictation doesn't work. Also, some users reported that they failed to make WhatsApp working with Siri on iPhone iPad running with iOS 10/10.1/10.2/10.3. For all those who are facing issues with iOS 10 Siri on their iPhone or iPad, we are going to provide some potential solutions by which you can easily get rid of such problems.


How to Fix: iPhone 5/6/7 Siri Not Working After iOS 10.3 After Update

1. Restart Siri on iPhone: Settings > General > Tap on Siri > Toggle it to off and turn on it again.

2. Reset Network Settings: Go to Settings app > General > Tap on Reset > Tap on Reset Network Settings > Enter your Passcode > Tap on Reset Network Settings to Confirm. After resetting, all the saved Wi-Fi password will be wiped.

3. Switch On/Off Dictation: Settings > General > Scroll down to keyboards > Toggle Enable Dictation to Off and Turn it on.

4. Enable Hey Siri: Make sure that Hey Siri option is enabled: Settings > General > Siri > Tap on Allow Hey Siri.

5. Clean your iPhone/iPad Microphone and make sure it is unobstructed and not damaged.

6. Update your iOS to latest version if available: check software updates to see if Apple releases a small update like iOS 10.x.

7. If Siri not working with your WhatsApp on iOS 10, make sure you’ve enabled Siri support: Settings > Siri > App Support > Enable Siri. Also, try removing WhatsApp and reinstalling on your iPhone.

More Related Articles You May Like:

Wednesday, May 10, 2017

Apple Music Starts Promoting Content With GIFs

GIFs are still all the rage these days, so Apple might not necessarily be late to the game ADVERTISEMENT or anything, but they’ve certainly decided to go big with them in its goal to promote Apple Music content.

Did you know Apple has its own official Giphy account? It does and its page is filled with custom GIFs from Apple ads, exclusive content, and music documentaries.

Also Read: How to Fix: Music Won’t Play on iPhone /iPod >

The earliest uploaded GIF on the account is from April 13th of this year. With the social media push Apple has gone on since its Apple Music inception, creating shareable GIFs seems like an understandable debut. By focusing on exclusives and releasing high quality GIFs from that content, Apple Music is creating more opportunities for discovery.

In all seriousness, the Giphy page looks to be another promotional avenue for Apple’s content. The account was brought to light today when the official Twitter account began promoting GIFs from the new exclusive Harry Styles documentary.

Apple’s custom GIFs can be found over at its official Giphy page, or by using the Giphy app on iOS with included iMessage app.

More Related Article You May Like

How to Delete All Emails in iOS 10 Mail App >
How to Make Google Maps Default on iPhone >
How to Unlock iPhone is Disabled Connect to iTunes with Three Methods >
How to Get Portrait Mode on iPhone 7 Plus >

How to Fix iPhone iPad Stuck in Recovery Mode While Updating to iOS iOS 10/10.1/10.2/10.3

"iPhone Stuck in Recovery Mode" is one of common issues while updating to a new iOS operating system. This problem may be caused by some other reasons, such as factory reset and wrong operation during jailbreak. Then, what can we do to get out our iPhone or iPad out of Recovery Mode if we get this issue while updating to iOS 10, iOS 10.1, iOS 10.2, iOS 10.3? There are two methods to help you.


Method 1. Fix iPhone iPad Stuck in Recovery Mode with PhoneRescue
The easier one goes first. We can use some professional iOS recovery tools to get your device back to normal when it’s stuck in Recovery Mode. And the "iOS Repair Tools" of PhoneRescue could be your best choice among all tools because besides "Recovery Mode", it also helpful if your device is stuck in "Black Screen" or "Apple Logo".

Method 2. How to Fix iPhone iPad Stuck in Recovery Mode
If you iOS device have been stuck in Recovery Mode while updating to iOS 10/10.1/10.2/10.3 and it’s not because of a hardware issue on your device, there are always some ways in which you can get your iPhone iPad back to normal. And in this post, we provide you with one free method to fix your problems.

Notice that this method may erase all data and settings on your iPhone iPad if you didn’t backed up your device before.

Step 1. Force-restart your iPhone iPad.
Press both of Sleep and Home buttons for about 15 seconds until it turns off. And after some seconds, turn on your device again to check whether your iPhone works normally. If it’s still stuck in Recovery Mode, jump to step 2.

Step 2. Update iTunes to the latest version.
If your iTunes is not the latest, you can run iTunes on your computer, and go to iTunes > Check for Updates… on the iTunes Menu to download the newest version. After downloading, just install it on your computer.

Step 3. Restore Your Device in Recovery Mode.
Run iTunes on your computer and connect your iPhone or iPad to computer. Your iTunes may tell you "it has detected an iPhone (iPad or iPod touch) in Recovery Mode. You must restore this iPhone (iPad or iPod touch) before it can be used with iTunes." After you see the message, just click OK.

Find your device icon on the menu and click it.

Select Summary tab on the left, and click "Restore iPhone (iPad or iPod touch)…" on the right panel. Now restore your iOS device to be normal.

More Related Articles You May Like
How to Fix Music Won’t Play on iPhone /iPod >
How to Get Portrait Mode on iPhone 7 Plus >

Monday, May 8, 2017

How to Fix iPhone Won't Sync with iTunes After Upgrading to iOS 10.2/10.1/10

"After updating to iOS 9.3.5, iTunes cannot sync music/photos to my iPhone 6, even if I downloaded and installed the latest iTunes 12.5.2 on my pc and recently updated to the new iOS 10.1" – One iPhone 6 plus user complained on Apple forum about iTunes sync problem in iOS 9/10.1.

Although Apple has always been releasing iTunes to fix bugs on syncing iPhone music and playlists, and recently puts 12.5.2 to support the latest iOS 10 update, there are still some iTunes issues you may meet when syncing songs, playlists, photos or some other types of data from computer to iPhone or iPad, especially when you are one of new iPhone 7/6s users. And in this post, for fixing "iTunes won't sync" problem, we offer some basic tips below, which we think would be helpful for the solving of some iTunes sync problems in iOS 8/9, and even the new released iOS 10.1 and iOS 10.2 update.

You May Like: How to Fix Music Won’t Play on iPhone /iPod >


Tips to Fix iTunes Sync Issues in iOS 9/iOS 10/iOS 10.1/iOS10.2

There are some simple tips that you can use to fix "iPad/iPhone cannot be synced with iTunes after an iOS update". Now let's check the basic tips below.
You May Like: iTunes won't recognize my iPhone/iPad/iPod – Quick Fix


Tip 1. Change another USB cable


Tip 2. Check WIFI connection.


Tip 3. Update iTunes to the latest version.


Tip 4. Turn off iCloud Music Library and iTunes Match on iPhone: Tap Setting > Music to turn off it.


Tip 5. Turn off "Show Apple Music" on iPhone: Tap Setting > Music to turn off Apple Music.


Tip 6. Turn off "Show Apple Music" on iTunes (Computer): iTunes > Edit > Preferences > General > Turn off Show Apple Music > Click "OK".


Tip 7. (For sync error 54) Read guide to fix iTunes sync error (-54).


Tip 8. Use iTunes alternative. You can use AnyTrans to sync selected files from iTunes to iPhone. It supports iOS 10/9/8/7/6/5.


More Related Articles You May Like

How to Sync iPhone iPad to New Computer >
iTunes Won’t Sync Videos to iPhone/iPad >
How to Get Portrait Mode on iPhone 7 Plus >

Thursday, April 20, 2017

How to Activate YouTube Dark Mode on Chrome, Opera, and Firefox

Recently, Reddit has discovered a method to activate YouTube dark mode on a browser, even though YouTube has not released this feature officially. In this blog post, we will share it in the following content step by step.

Step 1. Access Developer Tools

To access Chrome and Opera developer tools, you can use the keyboard shortcut Command + Option + I on Mac, or Ctrl + Shift + I on Windows. While on Firefox, you can use keyboard shortcut Command + Option + K on Mac, or Ctrl + Shift + K on Windows to get developer tools.

Step 2. Enter the Code
Paste the following text: document.cookie="VISITOR_INFO1_LIVE=fPQ4jCL6EiE" > Click Enter key > Close the developer tools > Refresh YouTube page.


Step 3. Activate Dark Mode on YouTube
Click on your profile picture in the top-right corner and click on Dark Mode > Turn on dark mode > Then your YouTube page will go into dark mode.
 After activating YouTube dark mode, your page will be like:
Note: This way is also suitable for activating YouTube dark mode on Safari fro Mac OS.


More Related Articles You May Like